Installing Pop!_OS 21.10 on an Acer Chromebook 15 (SAND)
Breaking out of Google's walled garden.
Preparation
Identifying your Chromebook
Unlike typical “PC” laptops, every Chromebook is quite different in terms of firmware and the process of installing a traditional Linux distro (without Crostini), so it is very important to identify exactly what model you have! Luckily this is as easy as navigating to chrome://system and looking at the hardware_class field — in my case SAND. This can be done in guest mode or as a signed-in user.
Creating Pop!_OS boot media
Download the latest Pop!_OS ISO (normal variant). Verify the download and flash it to a spare drive using my universal disk image procedure.
Enabling Developer Mode
With the Chromebook powered off, hold Esc+Refresh and press the power button to enter recovery mode. Then press Ctrl+D followed by Enter to disable OS verification and reboot. There is a 30-second wait and 2 loud beeps on the “OS verification is OFF” screen, followed by even more waiting until the Chromebook finally reboots with Developer Mode enabled. Connect to a WiFi network and proceed through setup until “Browse as Guest” becomes available.
Disabling write protection
First we must disconnect the battery to allow disabling firmware write protection. With the Chromebook powered on and charging, hold Refresh+Power while simultaneously unplugging the power supply (this requires 2 hands). After a few seconds, the battery should be cut off; confirm this by trying to boot the Chromebook with the power supply disconnected.
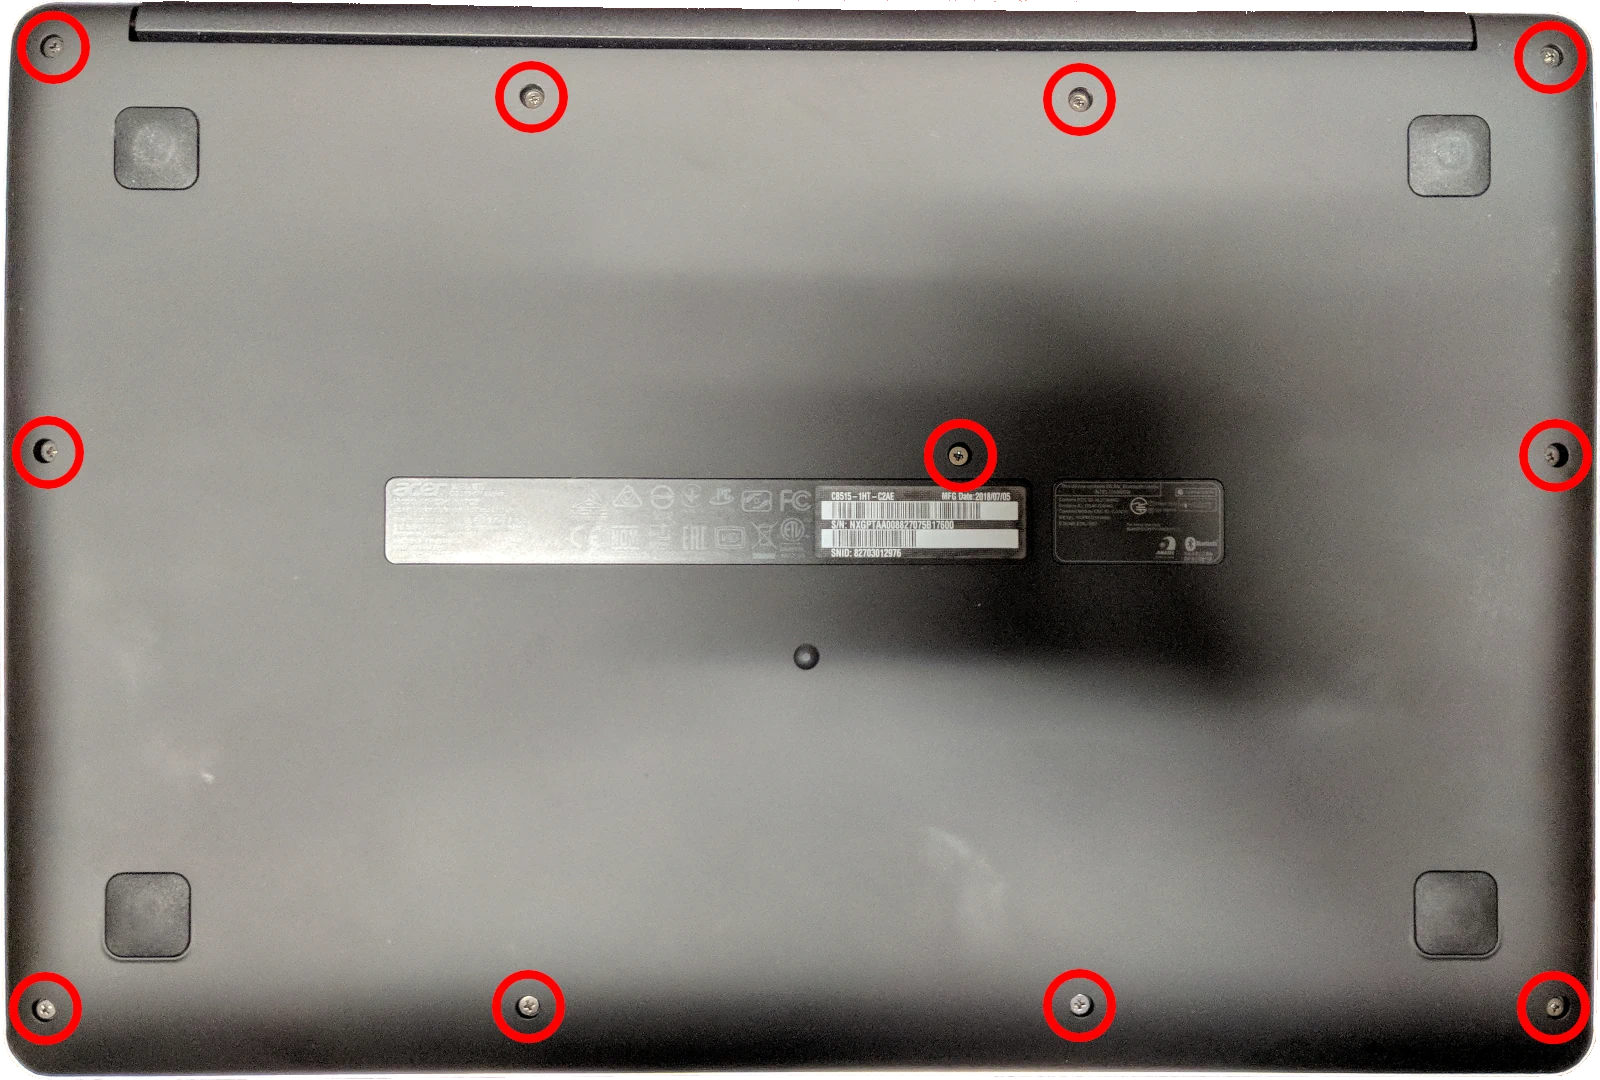
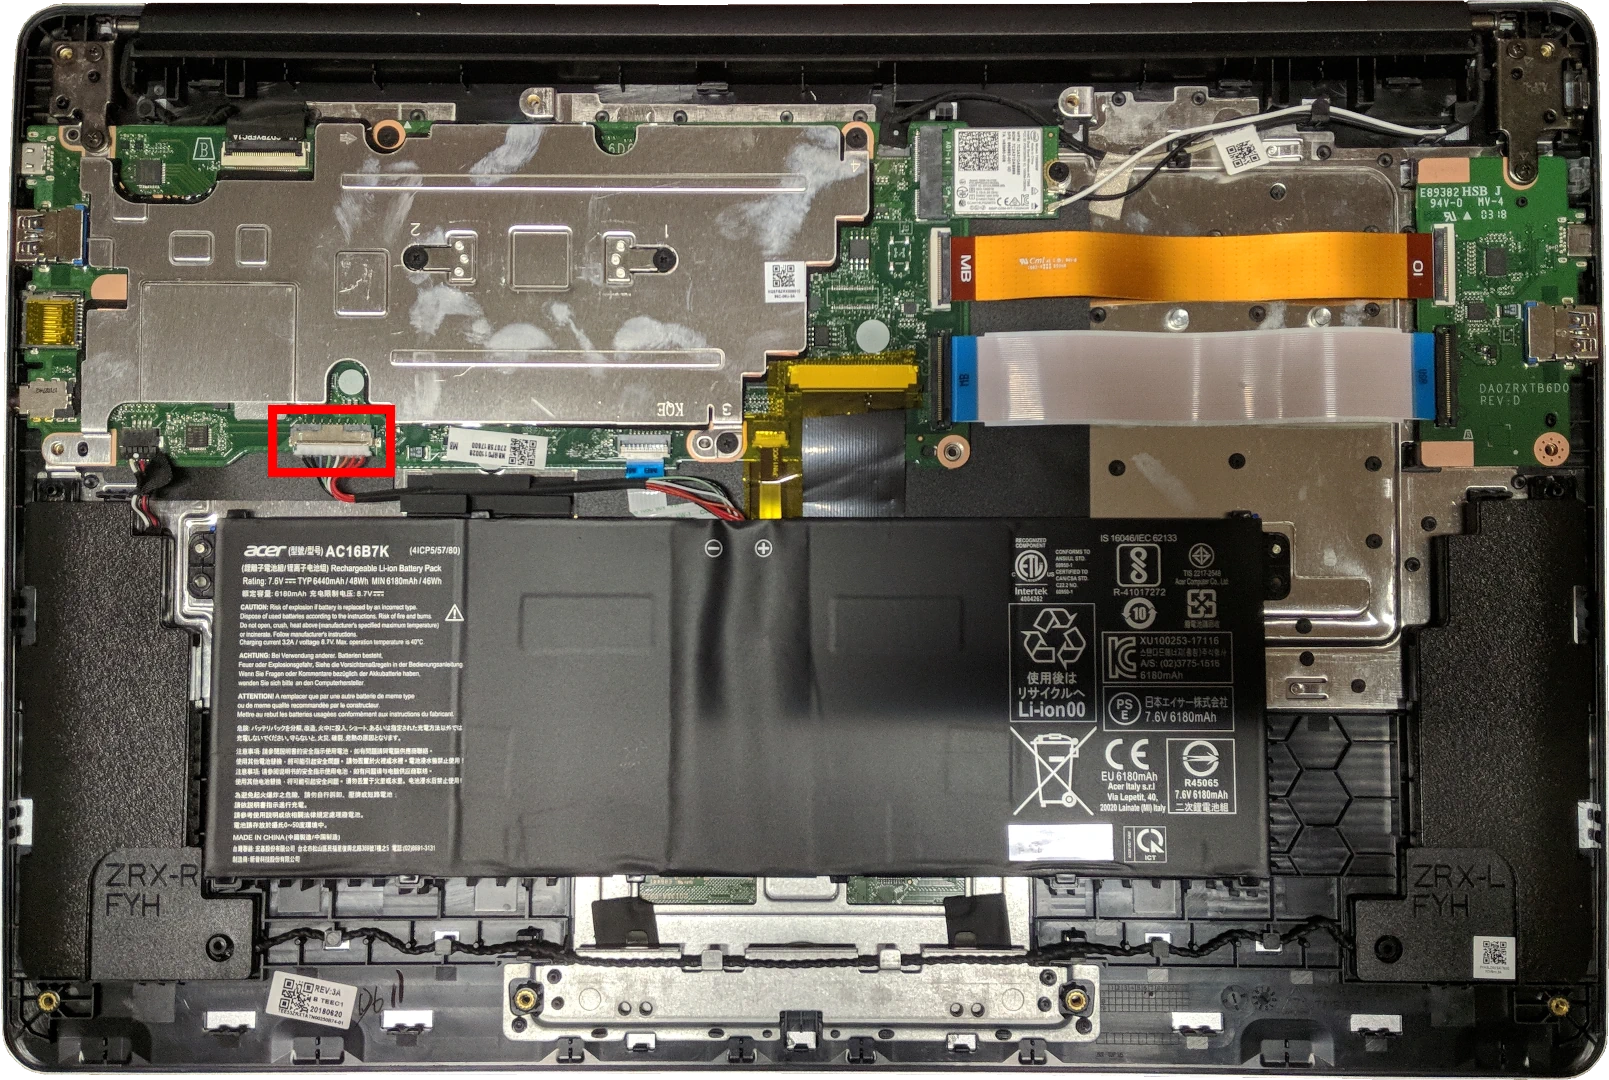
Remove the 11 screws on the bottom with a 2.5 mm Phillips driver and gently pry off the bottom cover with a guitar pick, credit card, or other non-marring pry tool. Carefully ease the battery connector out of its socket using the molded plastic tabs. Remove the battery from the machine (since it is not secured in any way) and flip the machine back over onto a non-conductive surface. If you do not have a non-conductive surface available, snap the bottom cover back into place.
Reconnect the power supply and boot into the Guest user. Launch the crosh terminal with Ctrl+Alt+T, and run the following commands to disable write protection:
crosh> shell
chronos@localhost / $ sudo flashrom --wp-disable
…
SUCCESS
This will persist even after reconnecting the battery. If you ever wish to re-enable write protection, simply run sudo flashrom --wp-enable from the crosh shell (no need to disconnect the battery). You can also run sudo flashrom --wp-status to check if write protection is enabled.
Power off the device, disconnect the power supply, and reassemble everything including reconnecting the battery.
Flashing firmware
Connect the power supply to disable the battery cutoff, and boot the machine. Login as Guest and launch crosh again (Ctrl+Alt+T). Run the following commands:
crosh> shell
chronos@localhost / $ cd; curl -LO mrchromebox.tech/firmware-util.sh && sudo bash firmware-util.sh
Follow the steps to install the UEFI (full ROM) firmware. This will require a flash drive (with a writable FAT32/exFAT/NTFS filesystem) to save a backup of the stock firmware.
After the process finishes, return to the main menu, connect the Pop!_OS bootable drive, and select R to reboot. As stated in the script, the first boot will display a black screen for quite some time.
Installing Pop!_OS
If you see an error that booting from eMMC failed, simply press any key to continue. This may drop you to the UEFI shell — after it finishes scrolling simply type exit and press Enter to access the UEFI settings. Changing the boot order is currently bugged and does not save, so just go to Boot Menu and select your USB drive to manually boot Pop!_OS.
Proceed through the setup to install Pop!_OS to the internal eMMC drive, /dev/mmcblk1. Custom partitioning can be used if desired.
Post-installation notes
- At the time of writing, none of SAND’s audio hardware works under Linux. In order to get audio output or input you will need to use Bluetooth or a USB audio adapter (such as those bundled with smartphones).
- In theory you can make the internal speakers work with some effort. I haven’t tried.
- The touchpad only has a single physical button. To get a more traditional right-click experience, run gsettings set org.gnome.desktop.peripherals.touchpad click-method "areas", or configure in GNOME Tweaks under Keyboard & Mouse > Mouse Click Emulation.
- By default, using 2 fingers will trigger right-click and 3 middle-click.
- The media keys are recognized as F1–F10. I am not sure if there is a good way to change this behavior.